
Phone Configuration
Updating the config file
- Plug in an ethernet cable to the port on the back of the phone that is labeled internet. If you don't have POE (Power over ethernet) you will need to plug in the power cable as well.
- The device will get an IP, Check the status tab in the menu on the phone and make note of the IP it receives. Also make note of the firmware patch. This guide is was written with patch 108.86.0.90 if you are on a newer patch you may need to downgrade and update this document as well as the config file for the phones.
- On you're laptop go to the following webpage https://the.ip.from.phone
- You will be asked to log in. default credentials are
-user: admin-pass: admin - On the left side of the webpage click on Settings then Configuration
- Under "BIN Configuration" click browse to import the latest .bin config file located at:
IST - Communciations/Phone System/YYYY-MM-DD Config.bin and then click import. The phone will then restart and apply the update. This should only take a few minutes to complete, if you find yourself waiting more then 5-10 minutes something is likely wrong. Check to make sure that you are using the latest config file and that you are on the same firmware patch that this guide is intended for. After this config is imported the credentials for the webpage with be different. You will need to use the handset password for the phone that can be found in keeper.
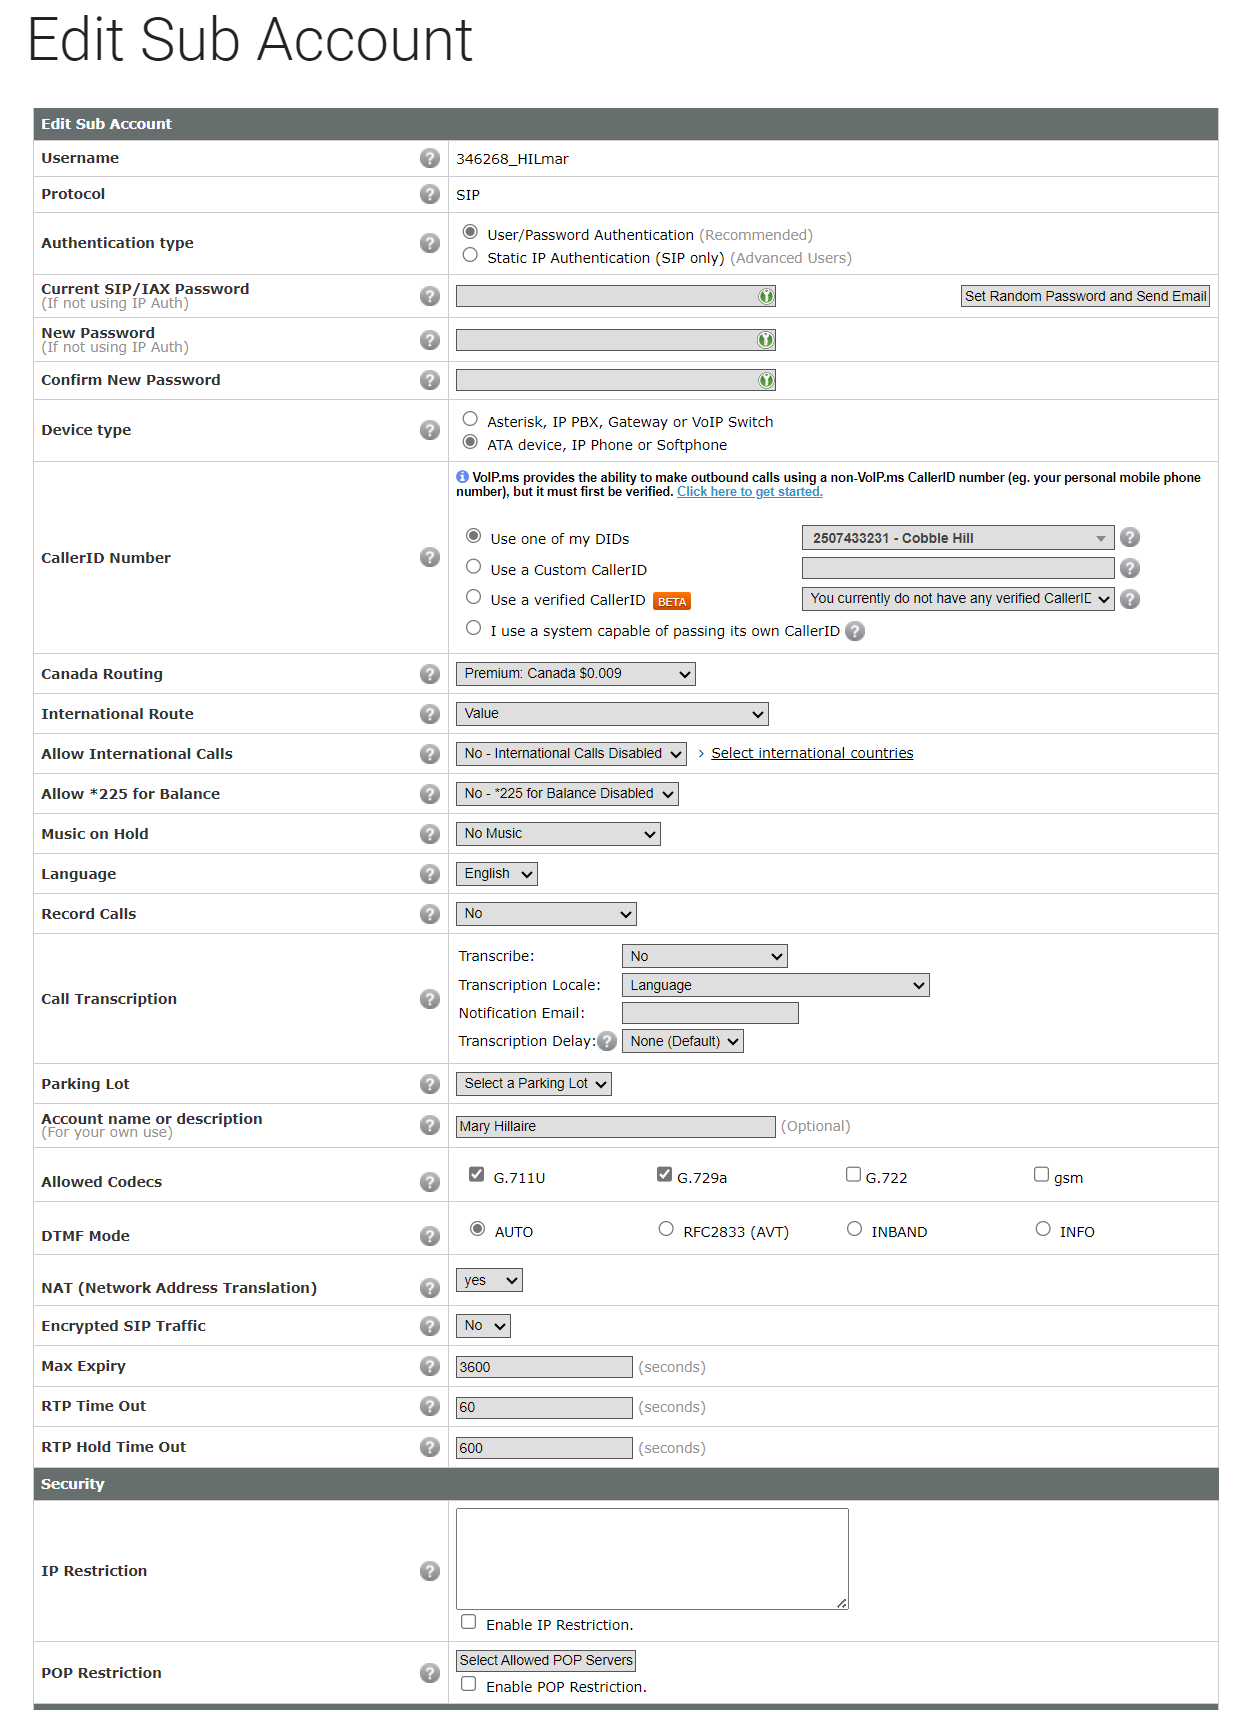
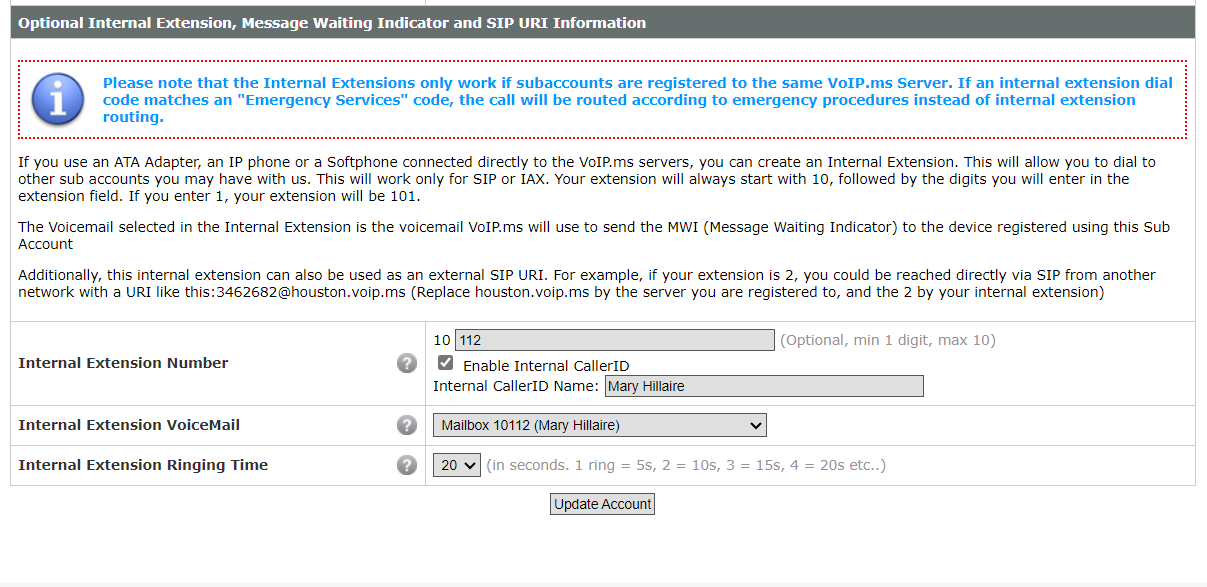
Creating an Sub Account
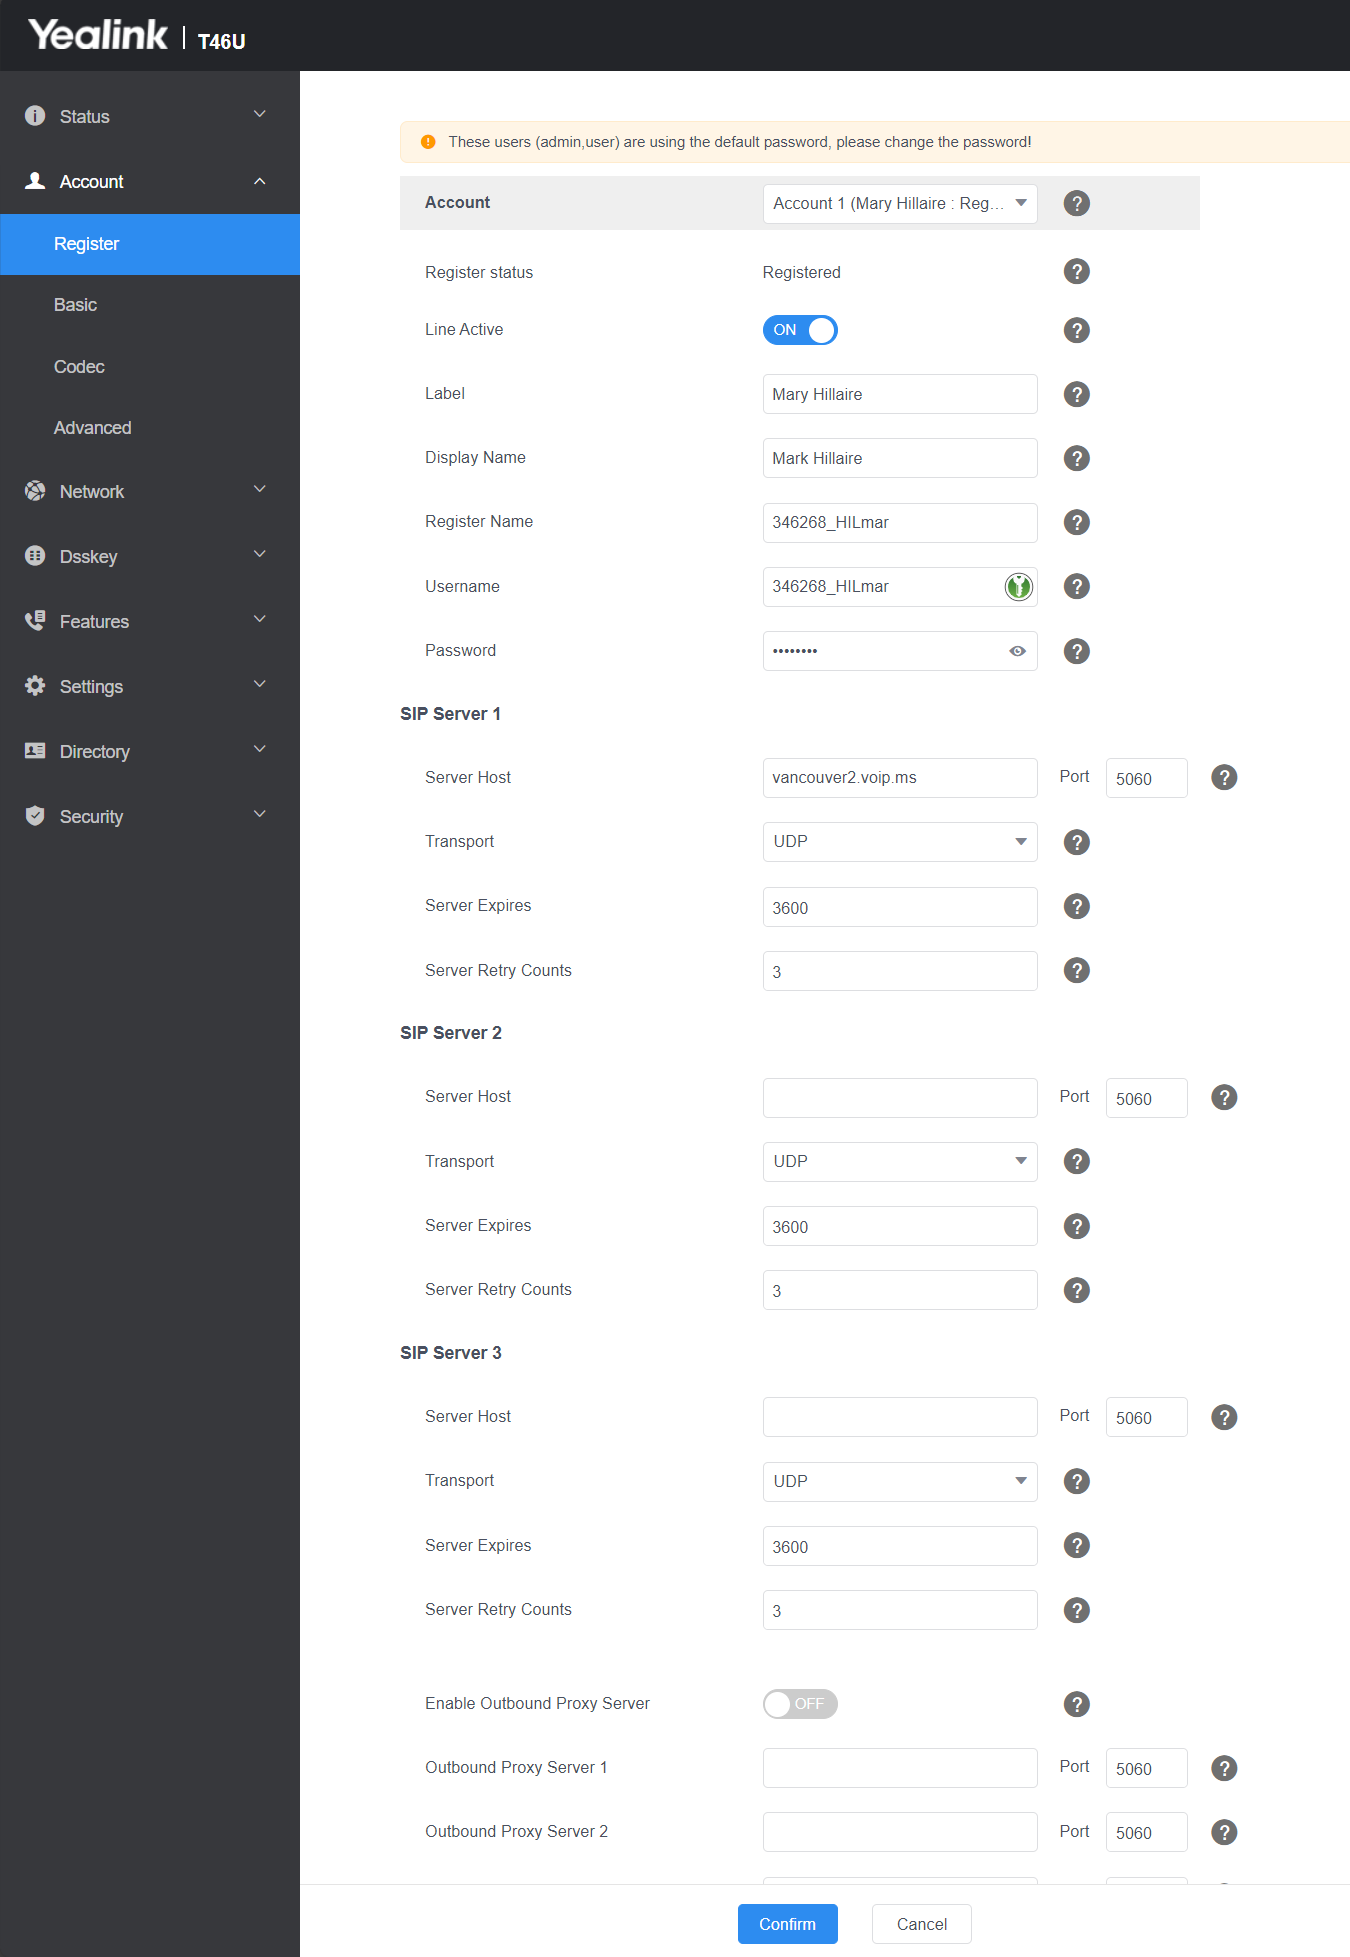
Registering the
Load configuration menu in settings
Import .bin from IST - Communciations/Phone System/YYYY-MM-DD Config.bin (latest)
Import and save
Factory Rest: Hold Speaker key, power off, power on, continuing to hold speaker key. Wait to see blue screen, hit 1.
Go to https://voip.ms/m/ivr.php (Digital Receptionist)
Under Primary Reception, click Edit
Scroll to the bottom of the page and click Add another choice